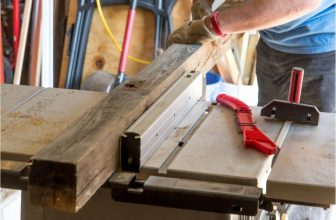
Do you want to know how to change a miter saw blade without getting injured? If you are a miter saw owner, you might need to learn how to do this simple action even if the blade is still new.
Once you notice that your saw has lost its effectiveness, you have to change the blade for a new one immediately. A dull instrument becomes a threat to your safety, no matter whether you are trying to cut the wood or soft metal.
Normally, miter saw blade replacement is not a hard task, but you still need to be careful with the sharp new tool.
Brief Guide to Blade Replacement
Learn when to replace a miter saw blade and how to do it using this guide. The process requires your total attention:
- The first thing you have to do is disconnect a saw;
- After that, loosen the bolt and remove the old blade. Follow these recommendations, and you will reach a pro-level of changing a miter saw blade;
- Don’t forget to tighten the bolt once the blade is replaced.
Changing the Blade Effectively
At first, this task might seem somewhat complicated. However, after you repeat it several times, the process turns into a routine. It might take up to 10 minutes. Before you start, ensure to have a screwdriver in front of you.
You might also need a clean rag for the blade. Read these instructions and fix your miter saw in no time. Never forget about the safety rules when using a miter saw.
Is your miter saw blade dull?
There is a simple way to check whether you need to replace a miter saw blade. You have to test it before you buy a new detail that can be quite expensive. Cut the wood and see whether the blade is still effective. Yet, there is a possibility you have to consider.
The old one might be just dirty. Even if you work only with the best wood, its pitch might still accumulate on the blade. The more you work, the bigger the layer of the pitch until you decide that the blade is dull.
Naturally, after some time, even a sharp blade will turn into a dull one under the layer of the wooden pitch since it corrodes the metal.
This is why, before you remove a miter saw blade, you have to clean the blade and make sure that it is dull and not dirty. You need a cleaner specifically designed for blades. Before you start, disconnect the tool from the electricity.
Once you clear it and wipe it with a clean towel, turn on the miter saw and check the blade on the wood. If the cleaning procedure did not help, you need to change it.
Changing saw blade: Step-by-step instructions
This is when you have to become extra cautious. If you don’t know the basics, it is better to learn them in advance. Read this guide, and if you need to refresh it in your memory or watch one of the useful tutorials with pictures, do it.
Usually, every saw comes with a manual, but if you lose one, that’s ok. You can google instructions for a specific miter saw. Here is a manual compatible with a vast majority of models:
- Step 1. Before you do anything, check whether the tool is disconnected from the outlet. You can’t possibly start removing anything before you do it. This is a major step to perform.
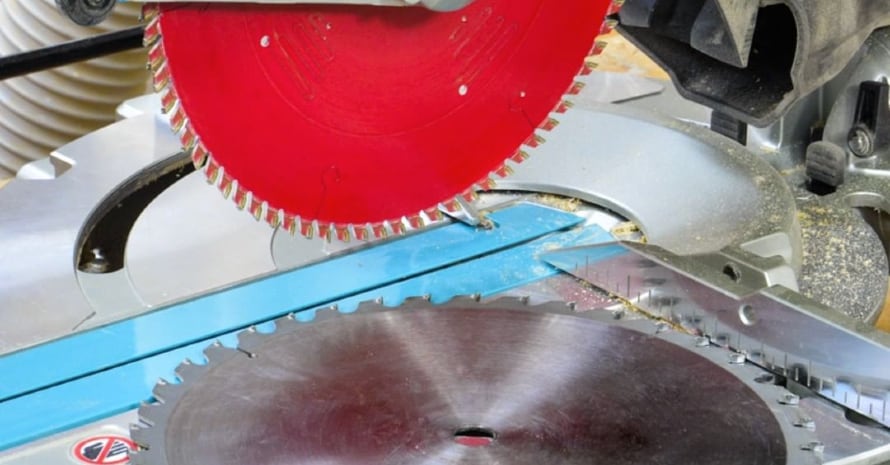
- Step 2. Now you can take out the Spindle Cover. Put the blade guard in the highest position. Detach the screw on the front from the cover. Let the cover go down from the back screw.
- Step 3. You need to take away the blade. Do it carefully since it still might cut you. Press the spindle lock until you release it. If you have another model, and the spindle lock can’t be completely locked, you have to turn it with pressure, using a 10-mm wrench. If the thread bolt is left-hand, turn it to the right to unfasten it.
- Step 4. Now you have to change the blade itself. Take a new one. You will have to repeat all your actions backward. Which way does a miter saw blade go? To find that out, pay attention to the arrows on the blade. They are pointing in the miter saw blade direction. Follow them to install the blade correctly. You might need to replace the bolt and washer. Turn the bolt to the left if you need to tighten it. Fixate the bolt using a 10-mm wrench. Don’t forget to put the spindle cover and lower the guard. The spindle lock must be disengaged before you turn on the instrument.
One more quick recommendation for you: your saw needs an adjustment once in a while. Just put the blade square towards the table, and its fence is square to this blade.
Pay attention to whether your saw blade is clean and don’t forget to wipe it with a towel after the job is done and you unplug the tool from the outlet.
Choosing the blade for your miter saw

If you have no idea which blade you should buy, you can simply use the old one as the source of information. Find the same model on the Web and buy it. However, if you want to upgrade your tool, you can also look for sharper teeth or even more solid material. Pay attention to the following aspects:
- The material of the blade. Think about the purpose of the blade. Will you cut wood only? Which type of wood will it be? Since there are no universal blades, you might need to buy different types for various projects. No matter what the blade is used for, the material must be of high quality;
- Type of cuts. Decide which cuts you need. Usually, it depends on the work you do. The more cuts it does, the more accurate the line you receive, but the longer it might take. Check out the number of teeth. The blades with a lower amount of teeth make rough but fast cuts;
- Native blade to the miter saw. Some miter saw developers release blades specifically for their models at least once a year, while others create universal tools for different blades. Check out whether there is a native blade for your miter saw on the market since it is more suitable for the instrument;
- Price. The price varies based on the material, developer, and even the purpose of the blade. The steel blade is the classic one, and also the cheapest option. Yet, it is good only for softwood. The high-speed steel blade is perfect for hardwood, but it is a little bit more expensive. The priciest option is the carbide-tipped blade, but it has a higher service period.
FAQ
Read the questions about the blades that are frequently asked by the customers. You might find the answers helpful for your specific case. I also recommend reading my manual again since it contains more details.
Which way do you loosen a bolt on a miter saw blade?
It depends on whether the bolt is of the left or right-hand type. Usually, it is left-hand, which means you need to turn it to the right to loosen it. If you need to attach it to your saw, turn it to the left.
When should I change my miter saw blade?
Once you notice that the blade does not cut the wood or any other material you are working with, you have to replace it. Before you do it, make sure that the blade is not dirty, and this is not the reason it does not work properly.
You can also change the blade if you need to work with another material or need to make other types of cuts.
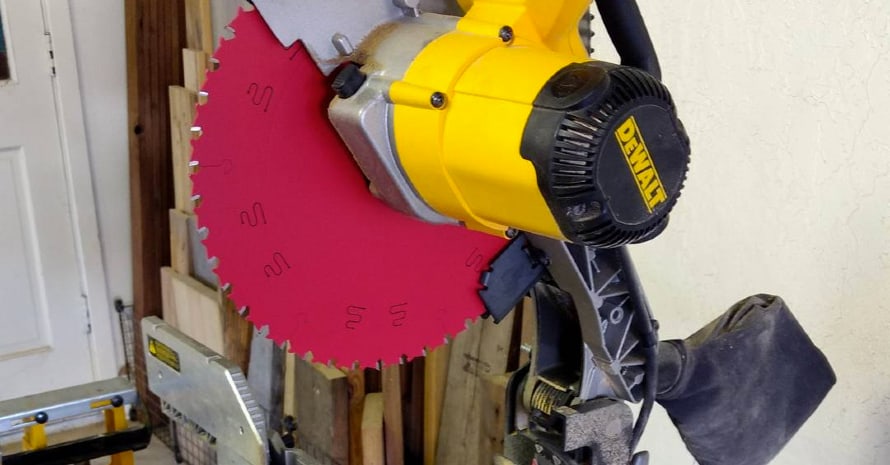
How do you change the blade on a DeWalt miter saw?
You can change the blade on any DeWalt model of the saw the same way that is described above. You can’t change and unlock the DeWalt miter saw blade without unplugging the saw in advance.
After you do it, carefully perform all the described steps. Usually, a DeWalt miter saw comes with a detailed manual, so you don’t have to search for it.
How do you change the blade on a Ryobi miter saw?
There are instructions for a Ryobi miter saw in the pack with the instrument. If you don’t have the pack, just follow the step-by-step guide I’ve made for you. To disconnect the details, use the 5 and 100-mm hex keys.
You might also need a screwdriver. Before you do anything, disconnect the tool from the power outlet. You have to release the blade guard, take down the bolt cover, and take out the blade. After that, adjust the new blade.
Also read:
- 7 Best Miter Saw Stands
- 7 Best 12-Inch Miter Saw
- 10 vs 12 Miter Saw
- Single Bevel vs Double Bevel Miter Saw
- How to Cut Trim with a Miter Saw
- Sliding vs Non-Sliding Miter Saw
- How to Cut a 22.5 Degree Angle on a Miter Saw
- How to Cut Baseboards With a Miter Saw
- How to Cut Crown Molding With a Miter Saw
Advanced Blade for Your Miter Saw
There are lots of high-quality blades on the market. You might have heard about names like Ryobi, DeWalt, Delta, or Craftsman even if you are new to the woodwork. No matter which model you pick, the first thing you need is to make sure that the blade works perfectly, doesn’t fall apart, or causes you any problems.
Once it is time to replace it, the whole procedure must not take you more than 10-15 minutes. Use the manual I’ve created for you and change the blades whenever you need them.
If you have more recommendations to add, you can do it in the comments below. I am also curious about how often you replace the blade. Please, share your thoughts with us.


“A good tool stays with you for many years and choosing carefully ensures the job is done right, your work is neat, and the tool is always a pleasure to use”