I know what you need! Learn how to rip narrow boards with a circular saw, right? In this detailed guide, I share everything I learned on the subject over the years in the woodworking industry.
Read it attentively, and you will learn what setup you need, how to rip safely, and the steps to achieve the perfect cutting quality. It’s generally considered a task for experienced woodworkers, but, hey, how can you gain the needed experience until trying to tackle the task with your own hands?
I think it’s time to learn something new!
Contents
Is it hard to cut a narrow board with a circular saw?
It’s generally not very difficult to rip wood with a circular saw. Yes, you need a steady hand to follow the ripping lines accurately, but it’s not that difficult, even for beginners.
Cutting the narrow board is where the problems start. It’s a complicated mission as you have to deal with the G-clamps that may get in the way. It’s also quite difficult to clamp the guide.
Step by step guide on ripping narrow boards with a circular saw

Ripping with a circular saw is a standardized process that includes essential steps that you have to follow. I did my best to make things as clear as possible for you. Enjoy.
What do you need
The toolset for this woodworking task is quite basic, but you can’t go without it. Here’s the shopping list:
- Pencil and square – use them to mark the ripping line on the workpiece.
- Measuring tape – you know how to use it, right?
- A thick wooden board that is at least thrice as wide as the narrow board you are going to cut.
- Sawhorses or any appropriate stand for this wider board.
- Clamps to secure this board.
- A circular saw with a clean and sharpened blade.
If you have all the tools already, let’s refresh the safety rules and get straight to work!
Safety Comes First
Before you start following the instruction from my guide below, make sure to refresh the circular saw safe use rules. If you’ve just bought the tool and going to use it for the first time, learn the rules by heart. Don’t let your love of woodworking be stronger than the wish to have 10 fingers till the end of your life! You can read the detailed safety rules via the link above, while I’ll focus on the main aspects:
- Close access to the workshop for kids and don’t let them in while working. You must be focused on the tool not to injure yourself, so there will be no time to pay enough attention to your kid.
- ALWAYS wear protective gear. Safety goggles to protect your eyes from splinters and chunks of wood, a respirator to avoid inhaling dust, and a working robe to stay clean and protect your skin from flying particles.
- Learn what a circular saw is and how it works. It’s not a beginner-level woodworking tool, so you must read the instructions and watch at least a couple of good tutorials.
At last, we can get to the main part.
Step 1: Make a platform and clamp saw to it
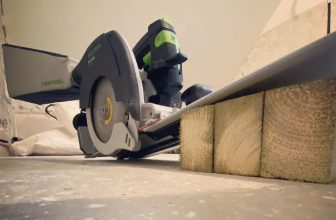
If you don’t have a workbench, you can use a stand or get a couple of sawhorses. First, place the wider board on the workbench or the sawhorse and clamp them together tightly. Next, you have to place the first narrow board and clamp it tight too. Now, you are going to sacrifice this board to make a reference cut.
Step 2: Measure & mark rip lines
Take your pencil and tape measure to mark the precise location of the workpiece and the precise cut line over the workpiece. You have a very narrow cutting space, so all the measurements must be very accurate.
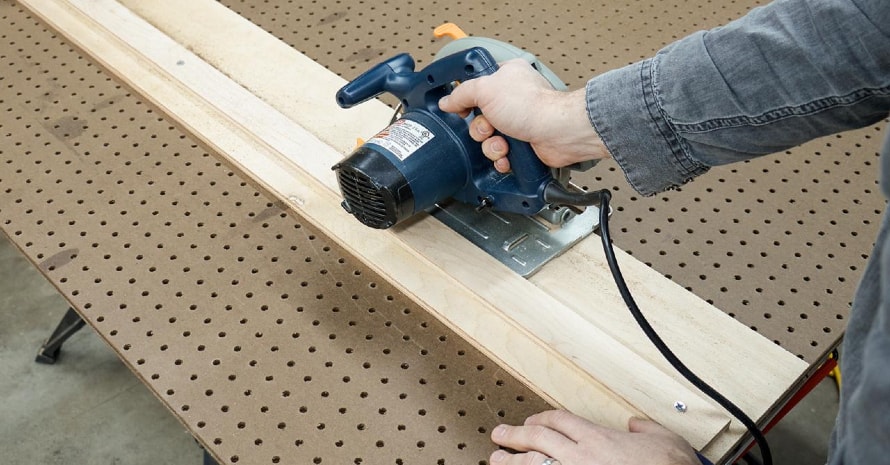
Step 3: Place the guide board
When all the marks are ready, take a piece of scrap wood with a flush edge. It should be properly sized to stand on top of the workpiece without cluttering the space. Place it squarely along the rip line.
When done, place the workpiece at the right distance from the pre-marked cutting line so that the blade has enough space to go straight by the line.
Step 3: Make a reference cut & adjust the blade
A reference cut (or cuts) is needed to ensure that you choose the right thickness and hold the saw the right way. The saw should also run in parallel to the platform. If everything is alright and you can make a clean cut, clamp the first workpiece.
Step 4: Rip the board!
Once you made a successful reference cut and fixed all the issues, it’s time to rip the board. Again, move very slowly and don’t stop the saw to ensure you or you may ruin the workpiece.
Useful Tips
Here are some quick tips and tricks that will help you:
- Always secure the workpiece, and the guides with C-clamps, or your cutting line will be crooked.
- Pick a table saw for this task if you have one.
- Don’t put force on the saw while cutting, but hold it very firmly to prevent swinging.
- Hold the saw with both hands.
- Tighten the clamps thoroughly.
- Stand on the side of the saw, not behind. This will reduce kickback recoil.
FAQ

If you still have questions about the process, you’ll probably find the answers below.
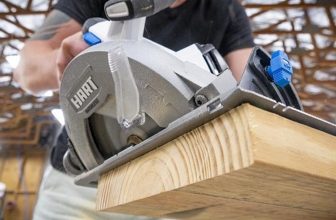
Can you rip a 2X4 with a circular saw?
Of course, you can, but the saw specs matter. Most of the saws with 6” or larger blades I’ve tested can rip through 2×4 in a single pass even at an angle.
For example, a 5-⅜” tool can cut in a single pass only at 90° and 2 passes at 45°. My favorite blade size for the tool is 7-¼” as it’s capable of the vast majority of cuts I need to make with and without a bevel.
How do you rip a narrow piece of wood?
In short, the steps include:
- Making a stable platform;
- Making measurements and guide marks;
- Securing the guides and the workpiece;
- Making a reference cut;
- Riping the board.
How do you cut a 2X4 the same length with a circular saw?
If you are about to rip 2×4 with a circular saw and need the same pieces (a “gang cut”), you can simply put marks all over the workpiece before cutting. To my mind, all other methods are too time-taking.
Also read:
Rip Like a Pro
As you can see, ripping a board with a circular saw is something you can do for sure if you follow the rules. Your circular saw has a lot of secrets you have to discover! Love and respect your tool and your projects will impress others.
Did my guide help you unravel the narrow board ripping puzzle? I hope so! You’re also welcome to ask me any questions on the topic in the comments. If you don’t have a circular saw and want the best one, make sure to read my top circular saw reviews right on this blog.


“A good tool stays with you for many years and choosing carefully ensures the job is done right, your work is neat, and the tool is always a pleasure to use”