How to Cut Trim with a Miter Saw: All You Need to Know
Ready to learn how to cut trim with a miter saw? In this super-detailed guide, I will explain the right approach and trimming technique so that you don’t waste a single piece of wood.
After reading this guide, you will not only learn how to make a perfect cut but also how to secure yourself while working and properly prepare your shiny miter saw for the job.
This is an experience-based guide, so you can be sure that all the tips below are 100% actionable and tested in hundreds of my daily woodworking projects.
Contents
Guide on How to Use a Miter Saw to Cut Trim
Cutting trim with a miter saw requires you to follow several important steps. Below, I explain how to get ready for work, which safety measures are necessary, how to choose the right cutting trim angle, and how to secure the workpiece properly while cutting. Don’t skip any section, and you will succeed!
Get your tool and materials ready
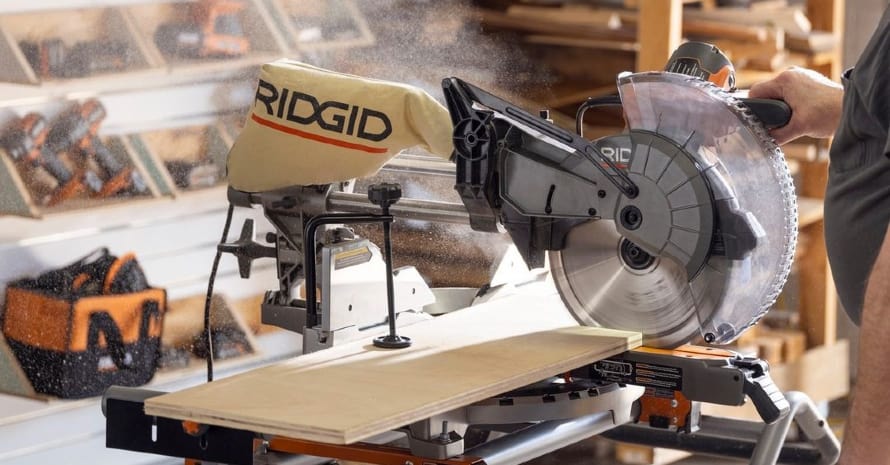
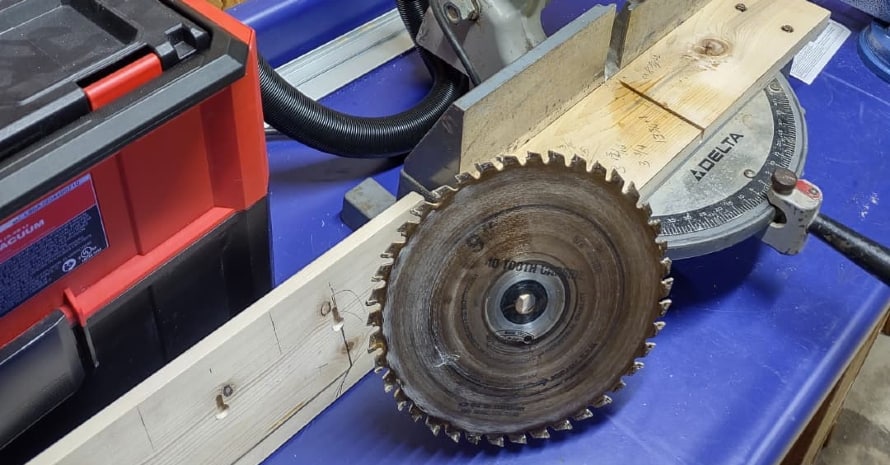
Preparing your miter saw, make sure that there’s the right type of blade on the tool. The standard miter saw blade on your saw might not be the best solution, so you might need to upgrade to a 60-teeth blade with metal tips for the best quality of cuts.
For even better finish quality, you might want to invest in a carbide-tipped blade with up to 72 teeth. Such a blade will cut a tiny bit slower, but the fine finish is worth it.
Next, you need to prepare your workpieces for cutting. At this stage, you need to perform fine measurements using your measuring tools to ensure that you make cuts in the right places, receive pieces of proper length, and trim them under the right angle.
Once this is done, make a draft cut with a spare piece of baseboard to ensure that the tool is adjusted properly and fine-tune it if needed.
Don’t skip these safety measures!
Here is a list of the miter saw safety measures that are necessary to follow:
- Refresh how to use a miter saw in your mind if you haven’t used it for long or use it for the first time.
- Always unplug the tool before changing the blade and when the saw is not in use.
- Wear woodworking safety glasses and construction-grade hearing protection while cutting to avoid eye and hearing damage.
- Don’t put your hands under the spinning blade even if it’s up.
- Keep the hand you use to hold the workpiece at least 6 inches away from the cutting line.
- Don’t wear gloves to have more control.
- Ensure that you stand firmly before starting to cut.
- Wait for the blade to completely stop spinning before lifting the cutter.
- Clear the base of the saw of wood chips after you make a cut.
Choosing the right cutting angle
When you make trim cuts, you need to know about two types of cutting angles – acute and obtuse. Besides, there are two types of cuts that are necessary for two pieces or baseboard trim match – inside and outside. Let’s figure out how to perform these kinds of angles and cuts.
Acute angle
To figure out the right acute angle for cutting trim corners, you need to measure the angle of the corner and simply divide it by 2. The result you get is the setting for your miter saw. Always double-check this measurement as not all angles in your house might be perfectly 90°.
You have two options to adjust the angle of the saw. If you have the basic tool, you can simply adjust the miter setting on the front and cut trim vertically.
If you prefer beveled cutting, and your saw allows it, you can adjust the bevel angle to the desired degree and cut it flat. However, the first option provides you with much more control and prevents you from accidentally cutting the trim.
Obtuse angle
An obtuse angle is an angle that’s greater than 90°. For example, you need to cut trim for a 120° corner. If you use the acute angle formula, you will get 60°, but if you cut the baseboard like this, two pieces will simply not match! That’s why there’s a special formula for such cases:
- (180°-120°)/2=30.
Or:
- 90-(120/2)=30.
Use whichever formula feels comfortable for you. The main target is to figure out the proper miter angle to set up your saw.

Inside and outside trim corners
It’s impossible to cut trim for the entire house if you don’t know the difference between these two types of trim corners. It’s quite easy, though.
- Inside corner – the inside corner cut is performed when you need to make two pieces of baseboard joint inside a corner that literally looks inside the wall. To position the baseboard for this cut properly on your miter saw, you need to adjust the miter function of your saw to 45° to the left and feed the board from the left. To cut the adjacent piece that will be installed on the right, you need to change the miter function to 45° on the right and feed the workpiece from the right. If you have a small miter saw, and the engine on the right doesn’t let you do this, put the miter function on 90° and bevel the saw 45° to the left. Put the baseboard flat on the base with the upper side looking towards you and feed it from the left to make the right cut. In the end, you will have 2 perfectly joining inside corner baseboard trims.
- Outside corner – the outside corner is opposite the inside-looking corner and requires a slightly different approach. To make it, you need to adjust the miter function of the saw 45° to the right and feed the board vertically from the left. For the second piece, you need to change the miter function to 45° on the left and feed the board vertically from the right. If you have a small miter saw, use the alternative cutting method described in the previous section.
Back cutting trim
Finally, you need to know what back-cutting or crown molding inside corners is. This type of cut is usually made to make two pieces of baseboard fit better in corners that are not perfectly 90° and require a company saw.
The idea is to cut out a hollow at 45° right under the trim to make two pieces of baseboard match perfectly no matter what the error is. To make the cut, you need to place the coping saw at 45° at the edge of the trim and cut slowly all over the contour.
You need to make this cut only on one piece, and the second will “kiss” it perfectly during installation, and you won’t need to start over.
How to stabilize the edges?
To stabilize the edges of long baseboard pieces while making a cut, you have to put a long flat surface of the same height that your miter saw base is, or simply put a ladder nearby and put the free end of the baseboard in between the stairs.
Besides, you can secure the workpiece on the base of your miter saw using an adjustable jig that is usually included with most miter saws. However, woodworkers usually simply hold the workpiece against the miter saw fence with one hand and plunge the saw with the second hand.
This method is safe if you hold your hand at least 6” from the cutting line and lets you work faster.
FAQ About Cutting Trim with a Miter Saw
Now you know almost everything and, luckily for you, I’ve included several more useful facts in this quick FAQ section. Read on and jot down what’s important. (Spoiler. Everything below is important!)

What are the angles for cutting trim?
In most cases, the proper angle to cut trim is 45° as you need to achieve a perfect 90° angle when you install the trim. However, small fluctuations can occur if the angle is not perfect. For example, if the needed angle is 90,5°, you have to divide it by 2 and cut trim at 45,25° to make two pieces match.
How do you cut baseboards with a miter saw?
Cutting the baseboard with a miter saw is very simple. If you need to make a straight cut, you can simply lay down the board flat and plunge the saw down to make a cut. If you need a standard 45° cut, simply turn the board flat, set the miter angle to 45°, and gently push the saw down to make a cut without changing the bevel.
What is the proper way of cutting with the miter saw?
Once you secure the workpiece on the miter saw, you need to choose the desired cross-cut angle, which is usually enough for trim cutting. If you need beveled cuts, choose the bevel angle as well. While cutting, don’t push the saw and move it down slowly to do the job. This technique is the best for both beveling and non-beveling miter saws.
Also read:
- 7 Best 10-inch Miter Saws
- 7 Best Miter Saw Stands
- What Is a Double Bevel Miter Saw
- Chop Saw vs Miter Saw
- Miter Saw vs Table Saw
- What Size Miter Saw to Cut 4×4
- How to Cut a 22.5 Degree Angle on a Miter Saw
- How to Cut Baseboards With a Miter Saw
- How to Cut Crown Molding With a Miter Saw
Do you cut the baseboard flat or vertical?
Cutting the baseboard vertically has multiple benefits over cutting it flat. First, this positioning makes it easier to adjust the angle by simply moving the miter function instead of adjusting the bevel on the back of your miter saw.
Second, it grants you higher precision. Finally, it provides you with a wider frame of reference as the base of the miter saw is usually wider than the vertical planes.
Congrats!
Well, now you are ready to go and test your knowledge in your workshop and then teach anyone to do the job as neatly as you can. There’s actually nothing overly complicated as soon as you know all the important stuff.
Hopefully, this wasn’t a hard read for you. If you find that something is missing, you can ask me a question in the comments or send it directly to my email address. Be sure that I will reply ASAP.
Good luck and don’t hesitate to share this guide with your fellow woodworking fans. More guides are on the way, so you can add my blog to the bookmarks too!
“A good tool stays with you for many years and choosing carefully ensures the job is done right, your work is neat, and the tool is always a pleasure to use”


