Sometimes, a roof might get cracks, holes, and leaks because of the weather conditions. The first solution that comes to one’s mind when they think about how to seal a flat roof is to call a professional.
However, you can also fix it on your own. Today, all the needed materials and tools are accessible. Sealing a flat roof might take some time, especially if you have a big roof in your house.
This guide is aimed to simplify your work and describes all steps in detail.
How to Seal a Flat Roof Step-by-Step
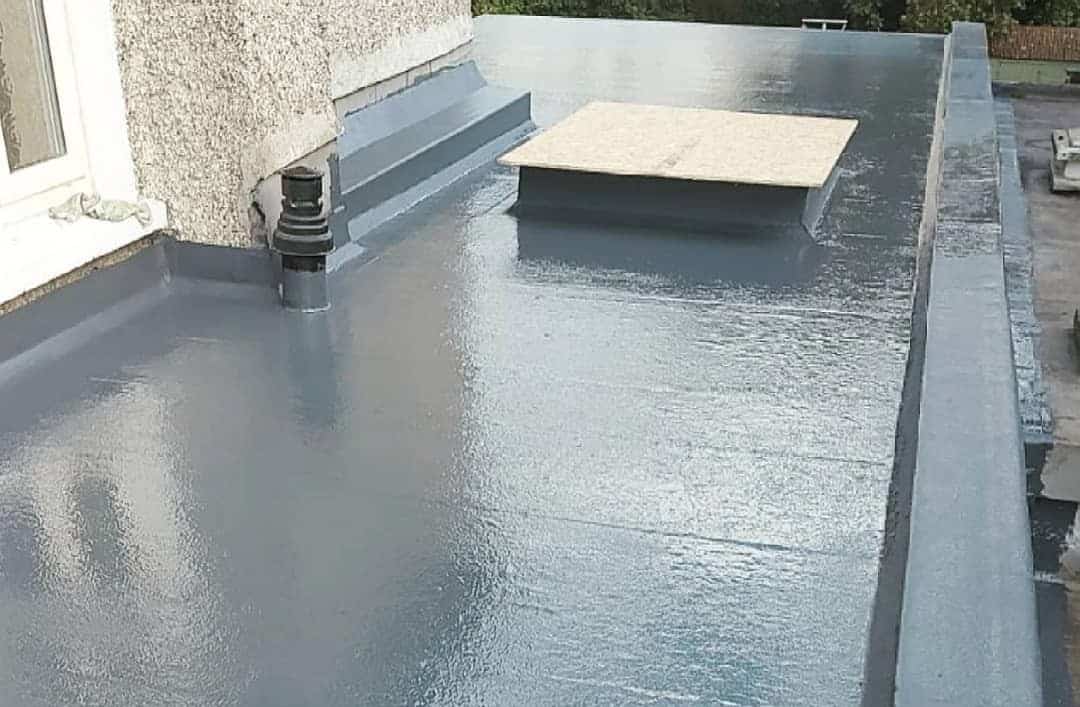
You should choose a day when the weather is pleasant and clean the roof for sealing. Then repair all the holes and cracks on the roof. Remove the old material and apply black or white rubber roof coating.
Some spots might require a brush, while other areas can be filled with a roller. In the end, allow the covering to dry.
Now, let’s look a little closer at all these steps of liquid rubber roof repair.
Step 1: Choose the right weather conditions
A flat roof usually gets damaged because of the weather conditions. That’s why it’s significant to repair it when the weather is dry, and no rain is expected for at least 48 hours. The temperature should be above 55 degrees Fahrenheit.
It’s not always easy to forecast such a day, especially if you need to seal the roof at the end of fall or the beginning of spring. It’s essential to choose a sunny day even if the temperature isn’t very high. Don’t neglect this step because, if the roof doesn’t dry properly, it will get damaged again.
Step 2: Clean the area
If there is any water on the roof, you should remove it before sealing. You can use either a dry or wet vacuum. Be attentive and don’t miss any wet areas.
The next step is to apply the rubber roof coating for flat roofs, which should dry to create a strong covering. It won’t work if the roof has some water on it. Also, after cleaning the roof, you will see all the holes and tears that must be repaired.
Step 3: Search for the holes and tears
Before you cover the roof with rubber coating, you have to fill all the tears and holes in the seams. Look attentively to find them. Then, apply the caulking gun to fill these seams with caulk.
There are different types of caulk, and I advise not to use a silicone one. The rubber covering doesn’t create a strong layer on this material. Before using caulk, read the instructions and discover how long it should dry. In most cases, you don’t need to wait for a long period.
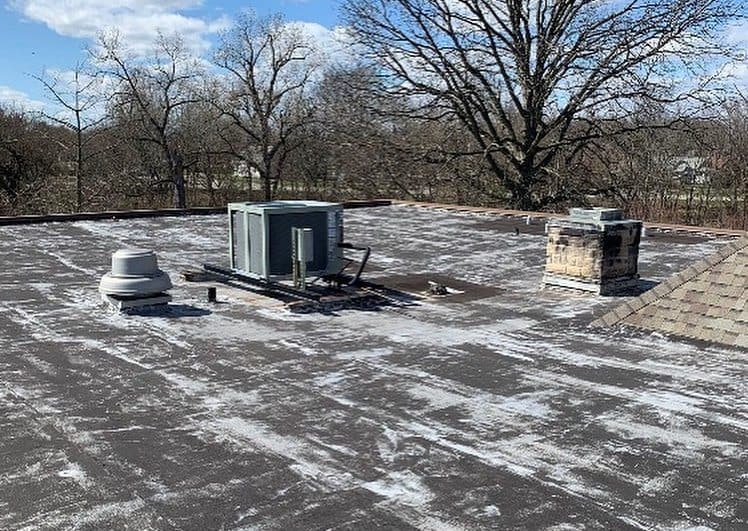
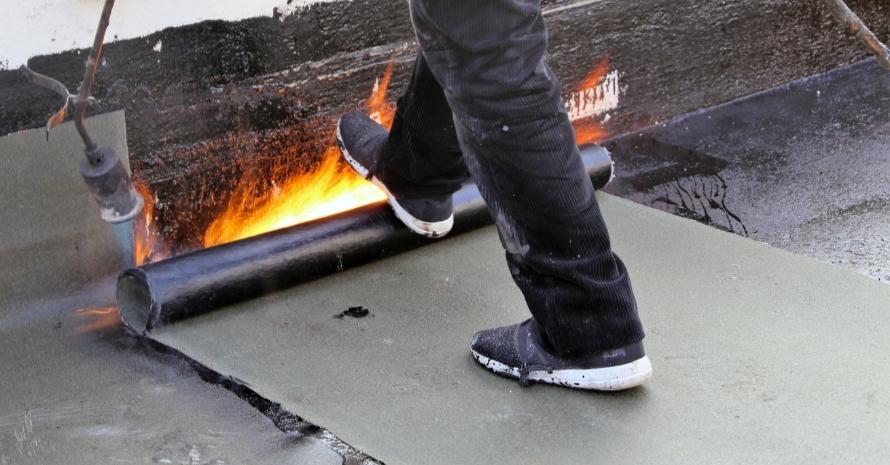
Step 4: Remove the old material
There might be the old caulk inside the seams that should be removed. That’s why you should use a scraper to get rid of the old caulk and all other material damaged by water.
Then use the caulking gun again. You should fill all the seams that don’t have enough caulk inside because it’s often the reason why water damages a flat roof.
Sometimes, the seam is too large to fill with caulk. Butyl roofing tape can help you in this case. Cover the seams with self-adhesive tapes to finish repairing the seams.
Step 5: Clean and dry the roof
When the seams are filled, you can clean the roof from mold and mildew. It can appear when the water stays on the roof for a long time and create favorable conditions for the mold to grow.
It might spread to the new covering, so it’s better to get rid of it. You should take a mildewcide cleaner for more effective results. Mix it with water and wash the roof; I find it convenient to use a stiff-bristled brush because it completely removes the dirt.
Next, rinse the roof with clean water. Allow it to dry before you go to the next step.
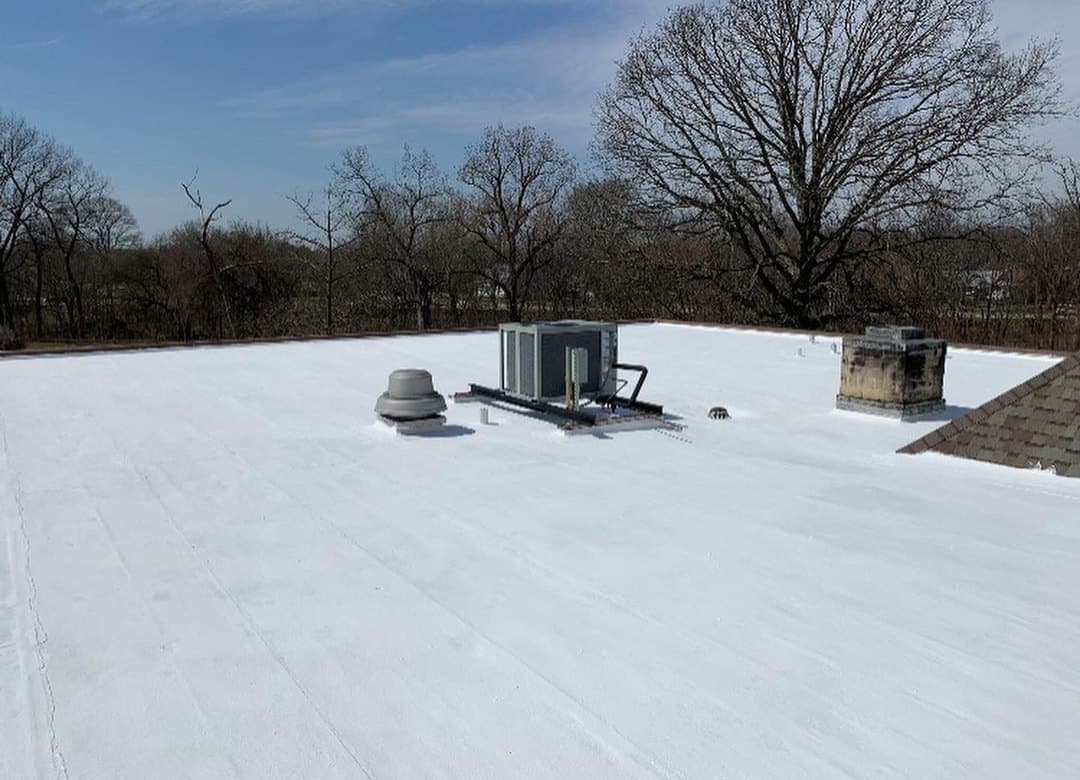
Step 6: Prepare rubber roof coating
Various manufacturers provide rubber roof coating that is waterproof and durable. Follow the instructions on the bottle to prepare a mixture. You might need more or less rubber coating depending on the size of your roof.
Usually, it’s one gallon per 50 sq ft. Rubber roof coating is tight, so you need a drill with a mixer attachment to prepare it. Some products are ready to use.
If you think that you ended up with too much rubber coating, it’s not a problem because a larger layer provides better protection. However, it might take more time to dry.

Step 7: Use a brush to set the perimeter
Covering the roof with rubber coating takes a lot of effort, but you can simplify the task. You should define the roof perimeter by filling the contour of flat roof patches with a brush.
Go around the vent flashing carefully. Also, the brush will help you to cover the areas where the roller can’t reach. Work with the corners attentively; you can make several layers for a durable result.
Step 8: Prepare a paint roller
A paint roller is the most convenient tool for roof sealing. You should choose a short-nap roller because it easily covers the surface with rubber. Additionally, the extension pole will help you to reach more areas and make the process quicker.

Step 9: Pour the liquid rubber and spread it
Start spreading the covering from the farthest corner. You should pour some liquid rubber and use a paint roller to distribute it in one area. This flat roof sealer doesn’t dry immediately, so you should spend as much time as needed to make a smooth layer.
There is no need to make it too thick because it might take too much time to dry, and the rain can ruin all your work. Also, look for the manufacturer’s instructions on how to put the rubber coating correctly.
Diverse flat roof repair products require various sealing methods. If there are no recommendations, you can simply distribute the rubber in a way that is convenient for you.
Step 10: Allow the covering to dry
You have done great work by now, and the last thing to do is to allow the surface to dry. In summer, it usually takes 20-30 minutes if the sun is shining brightly.
During winter, spring, and autumn, a roof can dry for several hours. There is nothing you can do to speed up this process. Check whether the roof is dry after a few hours.
FAQ About Roof Sealing
Sealing a roof with your own hands is diligent work. You have to know even the tiniest details about how to make the covering more durable. Check out this section for additional tips on how to fix a leaking flat roof.
What is the best way to seal a flat roof?
The guide above describes a reliable method of sealing your roof. Overall, it’s significant to fix the tears in the seams, clean the roof from the accumulated mold, and cover it with a sealant using a paint brush.
Usually, most professionals apply this method. They only choose different materials and tools for sealing.
What is the best sealant for a flat roof?
There are various products you can use for sealing, and they all have their pros and cons. One of the best materials for a flat roof is a rubber roof coating. It’s widespread among professionals. You can choose modified bitumen too. By the way, the technology of cool roof coating is becoming popular nowadays.
How to apply a roof sealant?
First of all, you should prepare it according to the instructions. Some products should be mixed, but some can be applied right after the opening. It would be more convenient for you to draw a perimeter with a brush.
Use a brush to fill the hard-to-reach areas. After that, you can take a paint roller and cover the roof with the coating. Just pour it on the surface and distribute it with a roller.

Can you reseal a flat roof?
Yes, you can repair the flat roof that was damaged because of the storm, wind, water, or other weather conditions. If your roof is already sealed, it might need one more procedure in some time. You can try different tools and materials to settle on the most effective method for you.
Which materials do I need to seal a roof?
The main material you need for sealing a flat roof is a sealant. You should also have a brush and paint roller for work. The caulking gun is required to fix the tears and holes. Additionally, you might require a stiff-bristled brush to clean the roof from the mold, but you can choose any other tool you prefer.
Also read:
- Best Fence Stains and Sealers
- Best Deck Sealers and Stains for Pressure Treated Wood
- Best Garage Door Seal
- Best Asphalt Crack Fillers
- Deck Sealing vs Staining
Seal a Roof with Your Own Hands
By sealing a roof in time, you protect your house from damages in the future. Every flat roof might need repairing after some time. Sealing it by yourself is affordable and doesn’t require any specific skills.
If you follow all the steps described in the guide, you will get a durable result. Have you ever sealed your flat roof? Which materials did you use, and what can you recommend to others? Feel free to tell us about your experience in the comments below.


“A good tool stays with you for many years and choosing carefully ensures the job is done right, your work is neat, and the tool is always a pleasure to use”